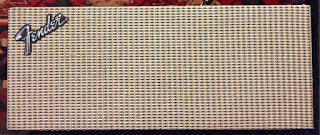
I have been looking for a long time for a true spring reverb unit that sounds like a Fender one and finally, some months ago, I came across Surfy Bear (now Surfy Industries). I find this reverb effect to be absolutely the best and affordable you can find out there, with that drip that makes your guitar surf.
This unit does not have tubes but it sounds like it has them!
 |  |
Items used:
1. Surfy Bear spring reverb kit
2. Spring tank reverb Accutronics 4AB3C1B
3. On/Off switch
4. 12V DC 1A regulated power supply adapter
5. Old Craftsman tool box that can fit the reverb tank
6. Black antique bakelite chicken-head knobs
7. Potentiometer dials
8. 12V LED pilot light model PL1601-R-12
9. Mini guitar pedal rubber feet
10. Water slide decal paper for laser printer
11. Satin lacquer spray paint
Tools needed:
1. 40W Soldering Iron
2. Helping hand soldering stand
3. Rosin core silver bearing solder
4. Electric wires
5. Electric pliers
6. Philips screwdriver
7. Wrenches
8. Drill
9. Multimeter
10. Laser printer
Once I got my Surfy Bear kit and my tool box I started drilling the holes and connect everything pretty easilyfollowing the instrucions. The only issue I had is to invert the power DC wires with a multimeter, as soon I finished connecting all the parts I turned it on and it was not working, so I check the polarity as written in the Surfy bear instruction and I solved the problem, it worked like a charm. Another small issue was that the first time I used a pilot light that you find in tube Fender amps were the light bulb has 6.3V , everything worked but the light bulb burnt out after a few hours due to the incorrect voltage, in fact was too bright when it was working. So I made my research and I found on eBay a 12V pilot light very similar to the Fender ones and, even better, I could use the old metal cap instead the new plastic one.
It looked awesome but I needed to make the labels for the pots and input/output so I got some water slide printable sheets, I then designed the labels, printed and sprayed with lacquer to protect the ink. I also made a personal Reverberation logo that I put on the back of the unit.
Useful links:
Pedal Heaven
True bypass switch diagram


